Film Bokeh Photoshop: Your Guide to Dreamy Edits
Adding Film Grain Texture
Adding a film grain texture to your bokeh can really enhance the overall effect and create a more authentic, filmic look. Here's how you can do it:
1. Find a good quality film grain texture. There are plenty of free and paid options available online. Look for one that matches the overall aesthetic you're going for.
2. Once you've downloaded your texture, open it in Photoshop.
3. Copy the texture layer and paste it onto your image with the bokeh effect.
4. Experiment with different blending modes to see what looks best. The "Overlay," "Soft Light," or "Multiply" modes often work well for film grain.
5. Adjust the opacity of the grain layer to fine-tune the intensity of the effect. You don't want it to be too overpowering.
Remember, the key is to make the film grain look natural and not too digital. It should complement the bokeh effect, not distract from it.
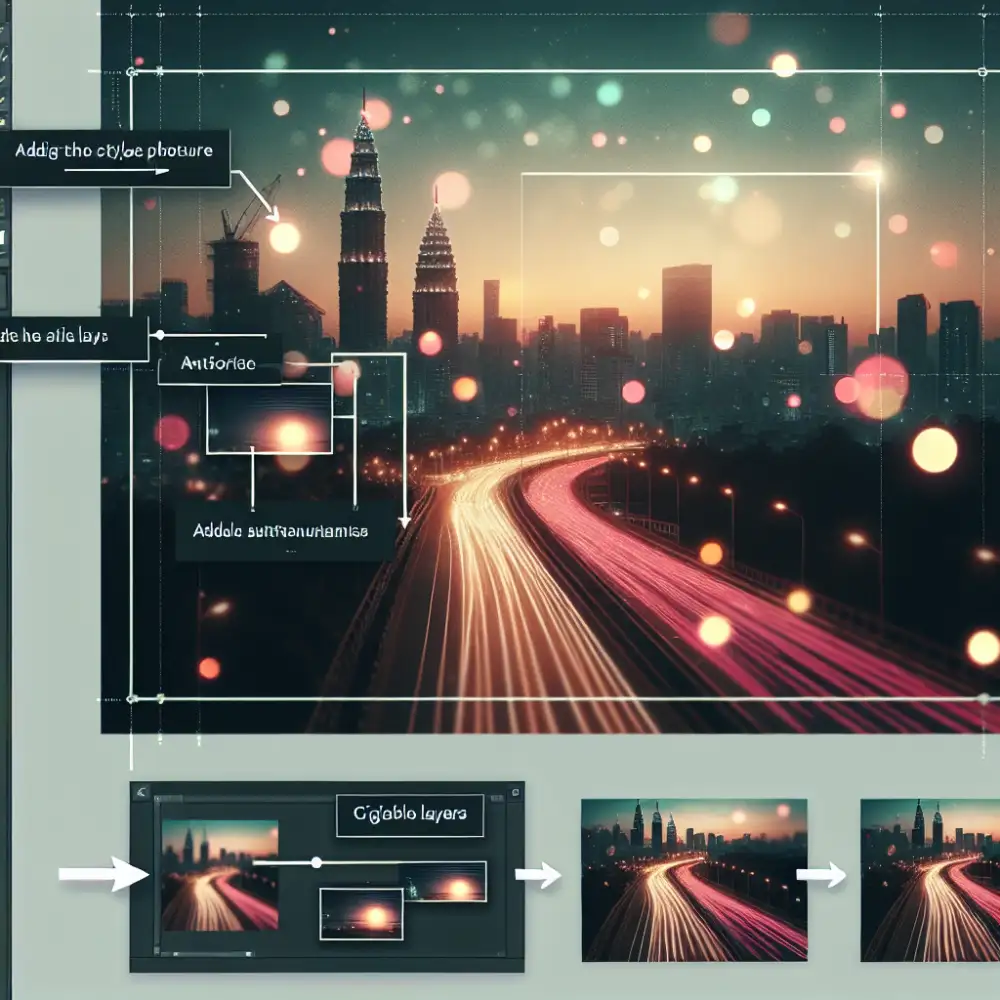
Applying Gaussian Blur
Applying Gaussian Blur is a key step in enhancing the dreamy, romantic feel of your bokeh effect. This technique, named after a mathematical function, helps to blend the light circles and create a smoother, more natural-looking bokeh. Here's how to use it:
1. With your film texture layer selected, go to "Filter" in the Photoshop menu bar.
2. Navigate to "Blur" and choose "Gaussian Blur."
3. A dialogue box will pop up, allowing you to adjust the blur's intensity. This is controlled by the "Radius" slider.
4. Start with a low radius value and gradually increase it until you achieve a pleasing softness in your bokeh highlights. Don't go overboard, as too much blur can make your image look unrealistic.
5. Keep an eye on your image as you adjust the radius. The goal is to achieve a smooth blend without losing the shape and definition of the bokeh circles.
6. Once you're satisfied with the blur intensity, click "OK" to apply the effect.
Remember, the ideal Gaussian Blur radius will vary depending on your image resolution and the size of your bokeh circles. It's all about finding the sweet spot that creates a natural and visually appealing bokeh effect.
Adjusting Blur Intensity
Once you've added your bokeh texture, you might find the blur intensity needs tweaking to better suit your image. Here's how to fine-tune it:
Gaussian Blur Redux: If you used the Gaussian Blur filter initially, you can always go back and adjust its intensity. Simply double-click the "Gaussian Blur" layer in your Layers panel to reopen the filter settings. From there, you can increase or decrease the blur radius until you achieve the desired softness.
Layer Opacity: A simpler method for adjusting blur intensity is by tweaking the opacity of your bokeh texture layer. Lowering the opacity allows more of the original image to show through, resulting in a subtler bokeh effect. Higher opacity, on the other hand, intensifies the blur.
Layer Mask Magic: For more targeted adjustments, consider using a layer mask. This allows you to control which areas of the image are affected by the bokeh texture. To do this, select your bokeh layer and click the "Add Layer Mask" button at the bottom of the Layers panel (it looks like a rectangle with a circle in it). Use a soft, black brush to paint over areas where you want to reduce or remove the bokeh effect. A white brush will bring back the effect if you need to restore it in certain spots.
Remember, the key is to find a balance that complements your image without overpowering it. Experiment with these techniques and trust your eye to determine the perfect level of bokeh bliss for your masterpiece.
Refining Bokeh Shapes
Film bokeh, known for its pleasingly organic and unique shapes, can be further refined in Photoshop to achieve specific looks. This is especially useful if you're trying to mimic the bokeh of a particular lens or create a dreamy, stylized effect.
One of the easiest ways to refine film bokeh shapes is by using Photoshop's Brush Tool. First, create a new layer and set its blend mode to "Screen" or "Linear Dodge (Add)". Select a soft, round brush with a low opacity and choose a color that complements your image. Gently paint over the areas where you want to enhance the bokeh. Experiment with different brush sizes and opacities to achieve the desired intensity.
For more precise control, you can use Photoshop's Shape Tool to create custom bokeh shapes. Start by creating a new layer and selecting the desired shape tool (e.g., Ellipse Tool, Custom Shape Tool). Draw the bokeh shape on the layer, then soften the edges using the "Feather" option in the Properties panel. Similar to the brush technique, experiment with layer blend modes and opacity to achieve the desired effect.
Another powerful technique involves using blur filters. Apply a Gaussian Blur or Lens Blur to the bokeh layer to soften the shapes further and create a more diffused look. You can also experiment with the "Field Blur" tool, which allows you to control the blur amount in different areas of the image, adding depth and dimension to your bokeh.
Don't be afraid to get creative with layer masks. By masking out specific areas of the bokeh layer, you can control exactly where the effect is applied, leading to a more refined and realistic result. For instance, you can mask out the bokeh effect from the subject of your photo, ensuring they remain sharp while the background melts away in a dreamy blur.
Remember, the key to refining film bokeh shapes in Photoshop is experimentation. Play with different tools, techniques, and settings to discover what works best for your image and achieve the desired aesthetic.
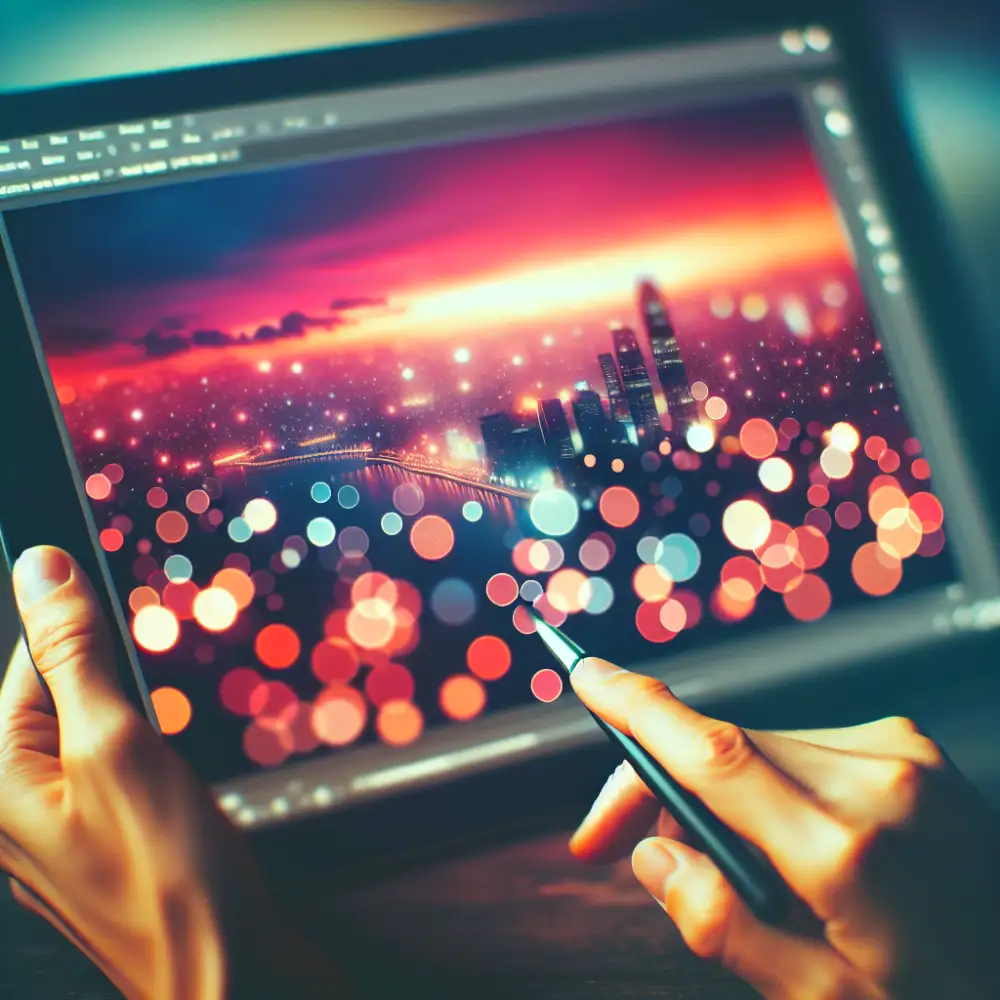
Enhancing Realism
Film grain and bokeh, two distinct characteristics of analog photography, can infuse digital images with a captivating sense of depth and realism. While modern cameras excel in technical perfection, many photographers find themselves drawn to the nostalgic imperfections and organic feel of film. Let's explore how to use film textures to enhance your digital images with a touch of analog magic.
Start by opening your chosen image in Photoshop. It's generally recommended to use images with a pre-existing shallow depth of field, as this will make the bokeh effect appear more natural. However, you can still achieve pleasing results with images that have a larger depth of field.
Next, you'll need to source a high-quality film texture. Numerous online resources offer free and paid film textures. When selecting a texture, consider the overall mood and aesthetic you want to achieve. Grainy textures lend a vintage or cinematic feel, while subtle textures add a touch of character without being overly distracting.
Once you've downloaded your chosen film texture, import it into Photoshop. Place the texture layer above your main image layer. Experiment with different blending modes to see how they interact with your image. "Overlay," "Soft Light," and "Multiply" are popular choices for blending film textures.
Now, let's focus on the bokeh effect. Duplicate your main image layer and apply a Gaussian Blur to the duplicated layer. The strength of the blur will determine the intensity of the bokeh. For subtle bokeh, use a lower blur radius. For a more pronounced effect, increase the radius.
After applying the blur, add a layer mask to the blurred layer. Use a soft, black brush to mask out the areas where you want the bokeh to be less prominent, such as the subject of your image. This will help to draw the viewer's eye to the in-focus areas.
To further enhance the realism, adjust the opacity of the film texture and blurred layers to your liking. You can also fine-tune the colors and contrast of the overall image using adjustment layers like "Curves" or "Levels."
By combining film textures with a simulated bokeh effect, you can transform your digital images into captivating visuals that evoke the timeless beauty of analog photography. Don't be afraid to experiment with different textures, blending modes, and blur settings to discover unique and compelling results.
Film grain and bokeh, two distinct characteristics of analog photography, can infuse digital images with a captivating sense of depth and realism. While modern cameras excel in technical perfection, many photographers find themselves drawn to the nostalgic imperfections and organic feel of film. Let's explore how to use film textures to enhance your digital images with a touch of analog magic.
Start by opening your chosen image in Photoshop. It's generally recommended to use images with a pre-existing shallow depth of field, as this will make the bokeh effect appear more natural. However, you can still achieve pleasing results with images that have a larger depth of field.

Next, you'll need to source a high-quality film texture. Numerous online resources offer free and paid film textures. When selecting a texture, consider the overall mood and aesthetic you want to achieve. Grainy textures lend a vintage or cinematic feel, while subtle textures add a touch of character without being overly distracting.
Once you've downloaded your chosen film texture, import it into Photoshop. Place the texture layer above your main image layer. Experiment with different blending modes to see how they interact with your image. "Overlay," "Soft Light," and "Multiply" are popular choices for blending film textures.
Now, let's focus on the bokeh effect. Duplicate your main image layer and apply a Gaussian Blur to the duplicated layer. The strength of the blur will determine the intensity of the bokeh. For subtle bokeh, use a lower blur radius. For a more pronounced effect, increase the radius.
After applying the blur, add a layer mask to the blurred layer. Use a soft, black brush to mask out the areas where you want the bokeh to be less prominent, such as the subject of your image. This will help to draw the viewer's eye to the in-focus areas.
To further enhance the realism, adjust the opacity of the film texture and blurred layers to your liking. You can also fine-tune the colors and contrast of the overall image using adjustment layers like "Curves" or "Levels."
By combining film textures with a simulated bokeh effect, you can transform your digital images into captivating visuals that evoke the timeless beauty of analog photography. Don't be afraid to experiment with different textures, blending modes, and blur settings to discover unique and compelling results.
Published: 24. 06. 2024
Category: lifestyle